Showing posts with label Tips. Show all posts

Sunday, 21 June 2015

Namibia Travels: Wrap Up

Namibia Dunes

For those who have been following me, you'll know that Frosty and I recently went on a camping holiday to Namibia in March. I thought it would be pretty useful to do a quick round up of the various practical aspects on the trip and some useful tips.

So here's my wrap up of our Namibia trip. If you've missed the previous posts, clik on the following links:
Part 1, Part 2, Part 3, Part 4, Part 5, Part 6

Costs
  • Remember N$1 = R1
  • Average Price per Night Camping: +- N$ 100 - 200 per person.
  • Other costs: if you're camping in some sort of reserve, you will probably need to pay another N$100 - N$150 for a permit to drive around the reserve.
  • Budget on about R1 - R1.50 per km that you'll be travelling.
  • When you get to the border, you'll pay around R200/N$200 for road taxes.
  • Try to buy and cook your own food, it'll probably work out to about the same that you would normally spend on food for the time period you'll be camping.
Food:
  • Breakfasts: Coffee and rusks.
  • Lunches: tomatoes, cold meat, butter and ryvitas along with a piece or two of fruit.
  • Dinners: Braai, salad/quick fried baby cabbage and potatoes or garlic bread (normal bread with garlic and butter inside).
  • Snacks of nuts, chips, leftovers from the previous day.
Other Useful Stuff:
  • Documentation (and a file to store it all) that you'll need at the border - this is what we used, but do a bit of research as it may change.
  • A pen and some paper - often the border posts won't have pens, and it's much easier if you can whip out your own pen to write with.
  • Make sure your spare tyre is pumped up. We were lucky and I only lost a hubcap. But you don't want to be stranded in the middle of Namibia with no spare tyre, as lots of the roads are dirt.
  • If you're into your photography, bring along your camera stuff. Namibia is an incredibly photogenic country! Try to limit yourself to one, multi-purpose lens*, because you don't want to be changing lenses in the middle of a sandstorm.
  • Take a set of socks for every day that you think you'll be wearing socks, and then add a few extra pairs for luck. Walking around with half the desert in your shoes isn't great.
  • Take as little camping stuff as possible when you have to unpack and re-pack every day.
  • A little dustpan and brush is useful for keeping your tent relatively clean. And put a brick of soap into your tent when you wrap it up to keep it smelling fresh!
Tent in dusty setting

Do you have any tips for when you're camping? I'd love to hear them in the comments below!

If anyone wants to sponsor me this Tamron lens with a Nikon mount, I would be more than willing to accept!


~~~~~ Follow Practical Cookie ~~~~~
~ Twitter ~ Facebook ~ Pintrest ~ Instagram ~

Sunday, 24 May 2015

Blogging - Behind the Scenes


Every now and then, I get asked how I find time to write regularly on my blog. This is one of those things that everyone who blogs has to deal with and figure out. As a new blogger, I just wrote and posted when I felt like it. I had a lot more time to myself when I started out, since I lived alone in Benoni and I was able to spend a lot of my evenings preparing posts. Since moving to Cape Town, it's been a bit more of a juggling act, but I've found that the most useful thing is to have some sort of plan (ideally written down somewhere). 

My blog plan involves trying to create and publish 8 blog posts per month (about twice a week). Sometimes I post more often than twice a week and sometimes I post less often. But usually, around the end of one month, or the beginning of the next, I sit down and try to brainstorm a list of 8 blog post ideas that I can share throughout the next month. I like the idea of having a total number of posts per month as it gives me a flexibility to choose what I want to post and when, as well as a tangible goal that I can look back on to see if I have accomplished it or not.

Many of the blogs I follow advocate having some sort of focus for your blog. Having a focus may at first seem limiting, but it can definitely help you to come up with good content and thus make you more inclined to find time to write. I'm still trying to figure this one out. At the beginning of this year, I started thinking about where I want to focus my blog. I have so many areas of interest that I don't really know what to include or exclude, but that's another story.

In terms of actually creating my posts, I find that free evenings and free weekends I spend a lot of time preparing for posts, getting the right pictures together, and actually writing a skeleton post that I flesh out a bit before putting on the final touches and posting. Sometimes I'll re-write a sentence or a paragraph multiple times in order to get it to read correctly. I have also found that I spend a lot more time these days editing my pictures and making them look good before I upload them to a post - looking back over my posts I like to think that the quality of my images has improved over time as I've learnt a bit more about photography and editing pictures! Knowing when I'm going to be busy allows me to plan in advance and prepare some blog posts in advance so that all I need to do is press "Publish" on the day which is a really useful trick.

Over April I didn't get around to creating a blog plan and it definitely felt as though I didn't have a plan last month. Luckily I was able to sit down last weekend and I wrote down a blog plan for May, that consists mainly of posts about our recent trip to Namibia (you can catch up on that here, here, here and here and as soon as I'm finished editing pictures, more posts will be up). Maybe I'll be proactive and even try and start my blog plan for June!

What are your best blogging tips?


~~~~~ Follow Practical Cookie ~~~~~
~ Twitter ~ Facebook ~ Pintrest ~ Instagram ~

Saturday, 16 May 2015

Namibia Travels: Part 4


Welcome to my Namibia Travels series! If you've just joined me, you can catch up on Part 1, Part 2 and Part 3 before making your way through today's post.

Day 5 and 6:
We woke up to a still-mizzy campsite. This called for some coffee and rusks with Frosty's folks, as well as his aunt and uncle (who very kindly let us gatecrash a night in their campsite with them at Tiger Reef) before we started packing up camp.

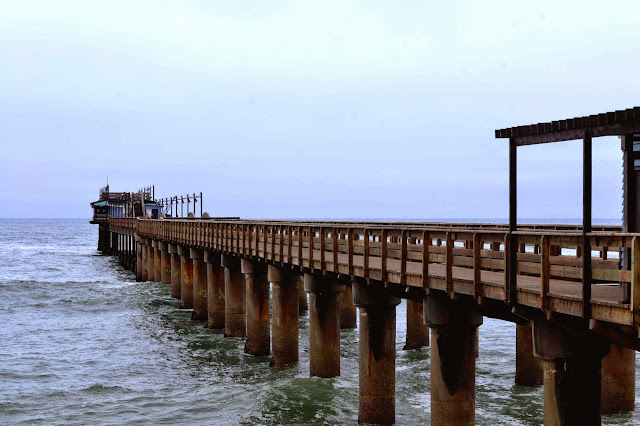
Luckily we didn't have too much to pack up and all too soon, 4 people's worth of camping gear was packed into my little car, we were bidding farewell to Frosty's aunt and uncle and we went on to explore Swakop a bit more before setting off on the road again. Since the weather wasn't ideal, we took a quick stroll along a promanade with a restaurant right at the end in the middle of the ocean. On our way back to the car, we encountered a very persistent and clever salesman who somehow conned convinced us to buy some carved pine nuts (on which he engraved our names amongst the pre-engraved animals while he was chatting to us). 


Black and white picture of wooden building on stilts, in water
Restaurant in the middle of the ocean.
I love this picture - when I edited in black and white it turned out really nicely!
Promanade disappearing into the page screen
Another shot of the restaurant in the middle of the ocean at Spitzkoppe.
Jetty 1905 Restaurant in Swakopmund Namibia
Black and white picture 
Purple orange sky at the sea
View of the land from the sea (restaurant) - the picture doesn't do the colours in the sky justice!
Before we left Swakop, we were told that Café Anton was the place to go and get coffee and Apfelstrudel. It had the most incredible looking pastries lined up on it's counters and it was just the thing to complement a cool day out on the Namibian Coast. 

On our way back to Okahandja, where we would be staying the night with a different aunt and uncle of Frosty's, we stopped off at Spitzkoppe. I wasn't exactly sure of what to expect, but a tiny pool of water surrounded by green grass in the middle of a bunch of rocks wasn't part of that expectation! We spent a lovely morning and part of the afternoon scrambling up rocks and finding a shady spot to have a picnic lunch. After arriving in Okahandja, we spent a lovely evening ensconced around a warm fire and chatting with Frosty's family. Other than our overnight stay at Savanna Guest Farm, this was the only other night when we didn't have to pitch a tent in the evening and then take it down the next morning!  


Socks drying on a dashboard and reflection in windscreen
My socks, all clean after having mayo all over them the previous day.
I loved the reflections in this pic.
Entrance to Spitzkoppe
The entrance to Spitzkoppe.
Yellow flower
Pretty yellow desert flower
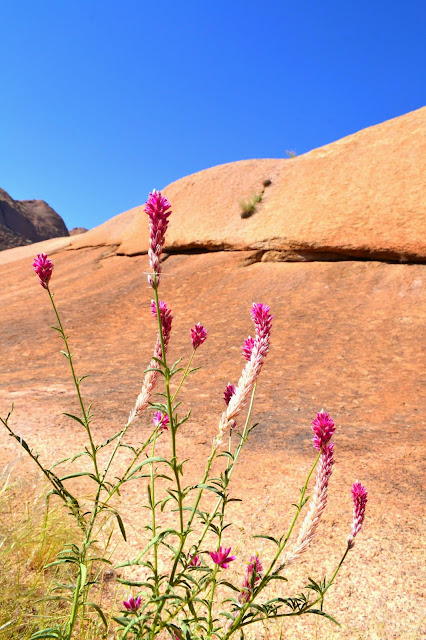
Pink desert flowers
Pretty pink desert flowers
Black and white picture of flowers and rocks
Black and white picture with Frosty in the background
Orange desert flower
Another desert flower - this time orangey/peach.
White curly desert flower
Curly plant with white flowers on it.
Lizard with yellow head and yellow spots on black body
We found a few lizard friends - here's one of them. Don't you love the colours?
Rocks and pool at Spitzkoppe
One of the pools at Spitzkoppe. Can you see Frosty doing his thing
(climbing to the top of the rocks) way in the distance?
Rocks and pool and tiny person at Spitzkoppe
Another pic of the pool - there were even fish and tadpoles inside!
Black and white picture of mountains and twig
Playing around with twig and mountain pictures
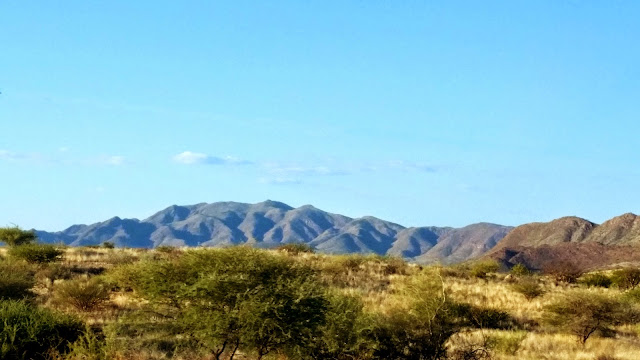
View from Spitzkoppe flat with mountains in distance
View from the rocks we found to climb in Spitzkoppe
View of pool and mountains in Spitzkoppe
And the view in the other direction - look how small the pool
looks from this view point!
Frosty and I playing around
Flat landscape with some black hills in Spitzkoppe
View from the very top of the rocks.
Lizard with orange head and tail, yellow on legs and black on body
Another lizard friend
Lizard with yellow head, orange shoulders and black body
And this guy, who we found in a tree!
Succulent plant with tiny orange berries
Orange berries - I loved the contrast between the orange and green.
We found a great picnic spot in the shade of a big rock.
Black bird sitting on car side mirror
This little bird kept coming back to admire it's reflection in my car window.
Sun bird feeding from a plant
Sun bird feeding (I think maybe the Dusky Sunbird)
Roadtrip in Namibia
Somewhere on the road between Spitzkoppe and Okahandja
Sunset over grassy area
Sunset on the road
Tree in the morning light
Beautiful tree outside Frosty's aunt and uncle's place 
Portrait of collie dog
I may have fallen slightly in love with this clever collie! 


~~~~~ Follow Practical Cookie ~~~~~
~ Twitter ~ Facebook ~ Pintrest ~ Instagram ~

Tuesday, 17 March 2015

Why Using Someone's Name Is Important


When I was small, I was very shy and my mum always used to struggle to get me to use peoples names when I said hello or goodbye. Saying "hello" was a push to little-me-at-5-years-old, so saying "hello Eugene" was often unfathomable. Every time I greeted someone, if I just said a quiet "hello", my mum would say "Hello who?" and I would then reply (if she was lucky) "hello Dolores" while clinging onto her leg or hand, looking down to the ground or hiding my face away.

Fast forward 17 years and I found myself sitting in a training session at the Four Seasons in Vail, being taught about the importance of greeting our guests by name and using their name in our interactions with them. I was no longer a 5 year old and I had become much better at greeting people by name (and remembering people's names), but this training session re-emphasised how important it was to use someone's name. It was so engrained in the company culture that not greeting guests by name felt incredibly wrong. Luckily, more often than not, we would at some stage either find out their name when they checked in to their spa appointment or restaurant reservation and you only had to remember someone's name for the duration of their appointment or meal. As a last resort you could get their name off their card at the end of their stay and then say something like "I hope you enjoyed your treatment Mr. So-And-So, I hope we see you again soon".

The idea behind addressing someone by name is very simple. It makes people feel important and valued and that they're a "someone", not a "no-one". If you make people feel important and valued and like a "someone" they're likely to think favourably of you (or your company) and therefore be more likely to want to interact with you (or your company) in the future. It's an easy way to make someone you just met feel important. And everyone wants to feel important. 


~~~~~ Follow Practical Cookie ~~~~~
~ Twitter ~ Facebook ~ Pintrest ~ Instagram ~

Saturday, 14 March 2015

Cape Town At Dusk and Night

Just before the fires that ravaged the Southern Peninsula in Cape Town, my mum, Frosty and I had a dinner at the Brass Bell and I used the opportunity to play around with taking photos at dusk and at night (on the drive home). 

I experimented with a range of exposures, ISOs and apertures - each picture has more detail on the settings I used. As always, I used my Nikon D3100 while taking these pictures. 

Here's a quick reminder of what these 3 different settings mean. Using a combined knowledge of these settings will hopefully help you to improve your photography (it's certainly helped me!):

Exposure (sometimes called Shutter Speed) is how long your shutter is open for. The longer your shutter is open, the more light is let in for a picture.

ISO: This is effectively your sensitivity to light. The higher your ISO, the more sensitive your light sensor will be to light. Also remember that the higher your ISO, the more "grainy" your photograph is likely to be.

Aperture: this is how "open" your lens is to light and it also affects your depth of field. Imagine your eye, where your pupil expands or contracts to let in more or less light. Your aperture is similar to this. A large aperture (f/1.4) means your aperture hole is open wide and things close to you will be in focus while things far away won'te be in focus. A small aperture (f/22) means that your aperture hole is very small and things close and far will be in focus. This post, over at Photography Life, explain it in more detail.

After a bit of editing in GIMP, here is the finished product of these pics - enjoy!

Surfer at Dusk in Cape Town
Exposure: 1/30s
ISO: 400
Aperture: F/7.1
Sea at dusk in Cape Town, Brass Bell
Exposure: 20s
ISO: 800
Aperture: F/5.6
View of the sea out the window at The Brass Bell
Exposure: 6s
ISO: 800
Aperture: F/5.6
View of the sea at dusk out the window at The Brass Bell
Exposure: 6s
ISO: 800
Aperture: F/5.6
View from Ou Kaapse Weg at night
Exposure: 13s
ISO: 800
Aperture: F/20
View of mountains from Ou Kaapse Weg at night
Exposure: 20s
ISO: 3200
Aperture: F/11
View of mountains from Ou Kaapse Weg at night
Exposure: 10s
ISO: 3200
Aperture: F/11
View from Ou Kaapse Weg at night
Exposure: 5s
ISO: 1600
Aperture: F/11
View from Ou Kaapse Weg at night
Exposure: 5s
ISO: 1600
Aperture: F/11


~~~~~ Follow Practical Cookie ~~~~~
~ Twitter ~ Facebook ~ Pintrest ~ Instagram ~

Monday, 15 December 2014

What is the point of a #Hashtag?

The hashtag has been around for a while now and lots of people use it in their statuses and photo captions - facebook, instagram and twitter posts often contain these little '#'s. But how many of you really know what the point of a #hashtag is?

  • To make up cool phrases such as #bestfriendsforever, #I'mDoingSomethingCool, #bestideaintheworld?
    No.
  • Used to add some #oomph to your picture captions/statuses/twitter feed?
    Not really.
  • To annoy people who prefer to read sentences that aren't littered with strange symbols?
    Surprisingly - nope, not that either. 
The point of a hashtag, my dear readers (and yes, there really is a point), is to allow you to add keywords, known as "tags" to whatever the hashtag is associated with, such as a facebook post, photograph, blog post etc. These tags are used by search engines when they crunch out their algorithms in order to bring you the most relevant information. When you then publish this thing and let it loose into the www, there are a few things that happen. 

In facebook/instagram/twitter, if you use hashtags, you will notice that they're click-able or searchable, or both. Click on a hashtag to see what others have been posting about that topic. If you can't find anything, it means no one has used that hashtag. 

You can create your "own" hashtag in order to keep track of things. I'm thinking of using these to keep track of my Practical Cookie blog posts.

Lastly, if you search for something on a search engine, and it has an associated hashtag, it will probably show up at some stage. It might not show up on the first page, but it will eventually!

So - use the hashtag to get found, discovered and find out what other people are associating to particular words!


~~~~~ Follow Practical Cookie ~~~~~
~ Twitter ~ Facebook ~ Pintrest ~ Instagram ~

Tuesday, 25 November 2014

Tips for Visiting Cape Town

The Mother City is a place that many people fall in love with when they visit her. Complex and many-layered, she offers something for everyone - the foodie, the theatre buff, the outdoors enthusiast, the holiday-maker, the student and anyone in between. No matter what type of visitor you are to the Cape, there are a few things that apply to everyone - here are my top 5 tips for visiting Cape Town. 

5. Leave Your Umbrella At Home
Cape Town is notoriously windy and while an umbrella may seem like a good idea when the rain is bucketing down, it's not always practical because it's inevitably also windy whenever it's raining. I've seen way too many umbrellas lost to crazy Cape Town winds and they're more a hindrance than a help in the Cape. Instead of bringing your umbrella along with you, rather bring along a rain coat with a hood.

4. Drive In The Right Lane
When driving in Cape Town (especially along Main Road) stay in the right hand lane as much as possible. This will help to minimise your frustrations with taxi's and buses who notoriously stop right in front of you without warning, usually in the most inconvenient places.

3. Don't Drink and Drive
Apart from the obvious safety implications, there is a huge police presence in Cape Town. At night (and sometimes during the day) there are often road blocks along the roads and while you may get lucky and get waved through a road block, drinking and driving just isn't worth it. It's much easier to catch a taxi. Or use Uber (which means you don't need to worry about cash!). 

2. Make Flexible Plans
The best laid plans can be blown to smithereens when Cape Town weather doesn't play nice. If you're planning to do something "outdoorsy" during your visit to Cape Town, I would suggest having a plan B which is geared towards more indoor activities. Since the weather changes at the drop of the hat, you need to be prepared to be flexible. Wine-tasting is always a good alternative. Alternatively, the weather is sometimes completely different on the other side of the mountain, so you could always try going for a drive to the other side if the side you're on doesn't have the weather you're hoping for!

1. Always take something warm with you
This is hands down the best piece of advice I have been given and if you remember nothing else, then remember this. I clearly remember being told by a relative, just before I started at UCT, that no matter where I go in Cape Town, I should always take something warm with me. Especially if it's somewhere that takes you from afternoon to evening. I have been saved many an evening of chattering teeth by this simple piece of advice.

Cape Town Mountains and Clouds
The view driving through Constantia Glen wine farm.


~~~~~ Follow Practical Cookie ~~~~~
~ Twitter ~ Facebook ~ Pintrest ~ Instagram ~

Monday, 22 September 2014

Global Collaboration

Remember that time I was lucky enough to go to Italy for work? Well, since then I've been working closely with an multi-disciplinary, multi-company team in order to specify and define the requirements for a project that is going to span different continents and use a combination of our system and a system designed by another company. 

This has required a lot of calls. At any one time, there will be people from at least 2 different continents (and usually more) sitting around our virtual table. English isn't always everyone's first language and while the conference calling facility we've used has been generally reliable, we have sometimes run into problems such as the ones illustrated in the two videos in this post.

There are a few things that I've learnt while being part of this project:
  • You need to make sure that everyone is on the same page.
  • Internet calls allow for some great collaboration (however, sometimes that isn't enough and face-to-face meetings are more productive).
  • Dial in to your calls at least 5-10 minutes early so that, if you have problems connecting, you can address them before the meeting.
  • The "mute" buttons are really useful, but don't forget that while you are talking with your colleagues "silently" the meeting is carrying on for everyone else so pay attention to what is being said over the connection.
  • Keep your language as simple and clear as possible, especially when English is not the mother tongue of some of the attendees.
  • Screen sharing is useful. But sometimes it's easier to just have everyone open up the document being talked about on their own computers.
  • A single point to save all working documents is important.
  • Keeping detailed meeting minutes is, quite probably, the most important activity during your calls.
  • Using on-line collaboration tools is great and can help make work run smoothly.
  • Have an idea of what needs to happen next (eg next planning stage, other meetings, important activities) and at the relevant time start confirming that these activities have started and time they will complete.


~~~~~ Follow Practical Cookie ~~~~~
~ Twitter ~ Facebook ~ Pintrest ~ Instagram ~

Thursday, 18 September 2014

Meeting Minutes Tips

Paper with writing on it and a pen
Manual Meeting Minutes
When you're trying to plan something that involves multiple parties and discussions and follow ups, keeping accurate meeting minutes is probably one of your most important activities

I know that most people know this. If you're anything like the me-6-months-ago, you would know and understand why meeting minutes are important, but not really have a good idea of what constitutes good meeting minutes and how to go about managing them. 

Luckily, in the last 6 months, I have been able to observe and learn from a pro meeting-minute taker and project manager (let's call him Minute-Man for the purposes of this post). 

Here are things that I've learnt from Minute-Man:

  • Not only are meeting minutes important, but so is communicating the minutes to all relevant parties who couldn't make the meeting (either via a separate call and/or including them on the mail of the meeting minutes).
  • Use your minutes to track who is responsible for what - then FOLLOW UP a few days later with a mail.
  • When you're not sure where the conversation is going, use phrases like "Sorry guys, I'm battling to follow where we are going with this point." or
    "I'm a bit confused as to what needs to be done here. Are there any specific actions that we need to note down or possible follow up discussions that need to take place?"
  • Keeping time is important.
  • If you see you are starting to go over the allotted time, check with everyone to see if they can carry on for an extra half hour or so, or if another meeting needs to be scheduled for a later stage.
  • Refer to previous minutes to check up on previous actions.
  • Before the meeting, have a basic agenda and discussion topics listed down and add notes to them as the meeting progresses.
  • Use coloured highlights to note attendance and actions.
  • Sometimes you need to have the same meeting with a second group of parties if you need their input on certain aspects of the project.
  • Label you minutes in a logical way. For example if you have a weekly update meeting label them something like 01 - Update Meeting 18 Sept. Create a special folder where you keep the Update Meeting minutes.
  • Lastly, be cheerful and upbeat (and mean it!) - you can hear it in the persons voice, and when the voice is the only thing you can interact with for a person, it makes a huge difference!
  • Use words like DONE and OPEN to note the status of actions as you go through them.

If you are needing a place to start - you can check out an example of meeting minutes below. You can also download my meeting minutes template and use that as a starting point for your own meeting minutes. Happy minuting!

Example Meeting minutes: 02 - Planning Meeting
Meeting Minutes template*: Meeting Minutes Template

* If the page tells you it can't display this document, don't worry, it's because it's saved as a Microsoft Office Template file. Download it, when you open it, it will open as a document that you can then save in doc format and not template format.


~~~~~ Follow Practical Cookie ~~~~~
~ Twitter ~ Facebook ~ Pintrest ~ Instagram ~

Monday, 8 September 2014

How To Take Pictures Of The Moon

This weekend was a good one. I finally found time to go shopping for a tripod and found one that I really liked (yay!). Then I had to wait until night time so that I could test out my tripod and finally figure out how to take pictures of the moon! 

I spent some time playing around with different settings and totally by accident finally found a combination that worked! You can take a look at the pictures below, I've included the settings that I used to take each shot so that you can test out the same thing with your own camera.

To take these pictures I used my Nikon D3100 DSLR and my 55-200mm lens. In some of the below pictures, I cropped the images to give you a closer view of the moon - which still gives a good quality picture.

Aperture: F5.6
Shutter Speed: 1/3
ISO: 450
White Balance:
Incandescent B4, G4


Aperture: F5.6
Shutter Speed: 4
ISO: 100
White Balance: Incandescent B4, G4

Aperture: F32
Shutter Speed: 1/6
ISO: 200
White Balance:
Cloudy B2,M2

How to take pictures of the moon
Aperture: F32
Shutter Speed: 1/6
ISO: 200
White Balance:
Cloudy A3,M2


Aperture: F29
Shutter Speed: 1/6
ISO: 200
White Balance:
Cloudy B6,M6

Aperture: F32
Shutter Speed: 1/6
ISO: 200
White Balance:
Cloudy B6,M6

Aperture: F32
Shutter Speed: 1/6
ISO: 200
White Balance:
Cloudy A6,M6

Green moon
Aperture: F32
Shutter Speed: 1/6
ISO: 200
White Balance:
Cloudy A6,G6

Aperture: F32
Shutter Speed: 1/6
ISO: 200
White Balance:
Cloudy B6,G6

Aperture: F32
Shutter Speed: 1
ISO: 100
White Balance:
Cloudy 0,0

Aperture: F32
Shutter Speed: 1/10
ISO: 200
White Balance:
Cloudy 0,0

Pale moon
Aperture: F32
Shutter Speed: 1/50
ISO: 200
White Balance:
Cloudy 0,0

 So, in summary. If you would like to take a cool moon photo with your DSLR and you're not sure how to start, try these initial settings and then take it from there:
  • Aperture: The F-stop number should be as large as possible. My largest F-stop is 32. (In other words the hole should be as small as possible).
  • Your shutter speed should be around 1/6th - 1/50th of a second. 1 second gives you an overexposed image and anything shorter than 1/50th of a second and your moon will start looking like a ghost.
  • ISO: should be a smaller number, rather than a larger number. Your ISO is the sensitivity of your sensor to the light, the lower the ISO, the less sensitive it is to light. 
  • White Balance: in this case, a white balance of 0,0 is fine. I was playing around with the white balance settings and that is what let me take "coloured" pictures of the moon.
Other then cropping some of my images, I didn't do any other post image processing on them, so all the colours and effects are from playing with the different settings! 


~~~~~ Follow Practical Cookie ~~~~~
~ Twitter ~ Facebook ~ Pintrest ~ Instagram ~